Using ActiveXperts Serial Port Component with ASP classic
ActiveXperts Serial Port Component is a software development kit (SDK) that enables the user to communicate to a device over a serial interface.
Such a device can be: a weight indicator, a modem, a scanner, or any other device that is equiped with a serial port. It can even be another PC, connected via a NULL modem cable.
ActiveXperts Serial Port Component features the following:
- Direct COM port support (like 'COM1')
- TAPI (Windows Telephony Device) support (like 'Standard 56000 bps Modem');
- Support for RS-232/RS422/RS485, up to 256 simultaneous ports;
- Support for all types of Hayes compatible modems;
- Support for serial cable as well as USB cable or Bluetooth connections;
- Support for Virtual COM ports (i.e. COM ports redirected through the network);
- Hardware flow control (RTS/CTS, DTR/DSR) and software flowcontrol (XON/XOFF) support;
- Configurable baudrate/parity/stopbits, full buffered data transfer, text/binary data transfer.
Step 1: Download and install Serial Port Component
Download Serial Port Component from the ActiveXperts Download Site and start the installation. The installation guides you through the installation process.
Step 2: Create a new Web Site
For this How-To we assume you are familiar with the process of setting up a website in IIS. It's important that ASP is enabled and the default document is set to 'Default.Asp'. Also, it's recommended to enable error messages when developing a website. This way IIS will show more elaborate messages when there's an error in your script.
You're now able to write an ASP script to send/receive e-mail using Serial Port Component.
Step 3: A simple test case
Start out with the simplest possible case. This is just creating the objects and outputting some version and license information to make sure the website is up and running and the ActiveXperts Serial Post Component can be accessed.
Use your favorite text editor to create a new file called 'Default.Asp'. Make sure this file is located in the directory that's associated with your website. Paste the following lines into this text file:
 <% Set objComport = Server.CreateObject("AxSerial.ComPort") %>
 <html>
 <head>
    <title>Serial Port Component Demo</title>
 </head>
 <body>
    Serial Port Component version: <% = objComport.Version %><br>
    Serial Port Component build: <% = objComport.Build %><br>
    Serial Port Component license status: <% = objComport.LicenseStatus %>
 </body>
 </html>
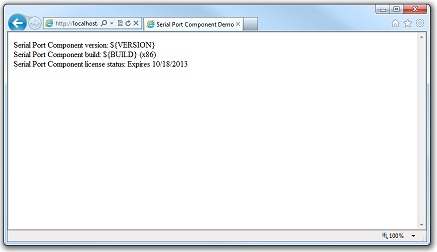
And test it with your favorite browser. The result should be like this:

(Click on the picture to enlarge)
Step 5: Send an AT command to a connected modem
You can now send and/or receive data to/from the serial port.
The following ASP code shows how to query a modem:
<html>
    <body>
    <font face="sans-serif" size="2">
    <hr size="1" color="707070">
    <b><font size="4">ActiveXperts Serial Port Component ASP Sample</font></b>
    <br>
    <br>
    <b>Query a modem connected to your webserver ( via Serial Port, USB or Bluetooth ).</b>
    <br>
    <br>
    <hr size="1" color="707070">
    <br>
    <form action="default.asp" method="post">
    <table>
        <tr>
            <td>Device:</td>
            <td>
                <select size="1" name="NUM_PORTID">
                    <option selected>COM1</option>
                    <option>COM2</option>
                    <option>COM3</option>
                    <option>COM4</option>
                </select>
            </td>
        </tr>
        <tr>
            <td>Baudrate:</td>
            <td>
                <select size="1" name="NUM_BAUDRATE" >
                    <option selected>Default</option>
                    <option>110</option>
                    <option>300</option>
                    <option>600</option>
                    <option>1200</option>
                    <option>2400</option>
                    <option>4800</option>
                    <option>9600</option>
                    <option>14400</option>
                    <option>19200</option>
                    <option>38400</option>
                    <option>56000</option>
                    <option>57600</option>
                    <option>115200</option>
                </select>
            </td>
        </tr>
        <tr>
            <td>Command1:</td>
            <td><input size=25 type=text name="STR_CMD1" value="ATZ"></td>
        </tr>
        <tr>
            <td>Command2:</td>
            <td><input size=25 type=text name="STR_CMD2" value="ATE0"></td>
        </tr>
        <tr>
            <td>Command3:</td>
            <td><input size=25 type=text name="STR_CMD3" value="ATI"></td>
        </tr>
    </table>
    <br>
    <br>
    <input type="submit" value="Submit Commands" name="BUTTON_SUBMIT">
    <br>
    <br>
</form>
</body>
</html>
There are many working samples included with the product. You can also find them on the ActiveXperts FTP site: ftp.activexperts-lab.com/samples/serial-port-component.
